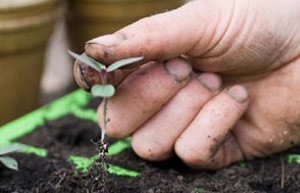
If so it’s time to move them on to bigger and better things. Once container-grown seedlings have germinated, it is usually necessary to prick them out. This involves teasing out the seedlings and transferring them to a new container.
Why is pricking out necessary?
If seedlings are left to grow on in crowded conditions, they become drawn, with small leaves and long spindly stems and will never grow into good quality, sturdy plants. Pricking out will give seedlings more light, space and air making them less prone to fungal diseases. At Writtle College most courses have been undertaking this task in readiness for summer bedding borders, vegetable plots and or trees and shrubs that were sown late last year.
The seedlings are transferred from a seed sowing compost to potting compost, which contains a higher level of nutrients than seed compost. Use a multi-purpose or a specific compost suitable for the plants you are growing on.
Broadcast seedlings may germinate erratically so that a range of sizes can be seen in the seed tray. They can be graded during pricking out so that growth is more even. Next time to avoid this try out modular trays – these contain cells of compost for individual seeds so there is no competition for water or nutrition. As a result they can be left to grow for longer before moving to the next size pot.
Seedlings are spaced out so that they grow at a uniform rate. This should mean that all the plants will be ready at the same time.
When should pricking out be done?
Basically as soon as possible! The seedling should have leaves that are large enough to handle and a simple, single, short root that will not be damaged by transplanting. Another indicator is when seed leaves are touching.
Working area
Pricking-out should be undertaken either in a purpose-built, clean pricking-off shed or in the glasshouse beside the area where the containers of pricked-out seedlings are stood down. I haven’t any of these so I have ‘borrowed’ the dining room table and often use the draining board much to the consternation of my partner!
Gather all the necessary equipment and organise the workspace so it is both comfortable and efficient.
Equipment
Choose a suitable potting compost such as loam-less potting compost (peat or coir potting compost) or J I No. 1 potting compost. Never re-use potting compost for fear of disease.
Containers used range from seed trays to modular trays or pots depending on the seedling. Today seed trays are less popular and modular trays are more common. Containers must be clean to prevent the spread of fungal disease.
A striking off board is used to remove excess compost and boards that mark the pricking out stations are sometimes useful. They may be bought but maybe made with two pieces of wood and nails spaced at regular intervals.
A dibber (a length of bamboo cane or a proprietary one) is used to tease out the seedlings.
Method
Prepare the container by filling with compost and strike off the excess. Modular trays should be tapped to settle the compost.
If pricking out into a tray an adapted striking off board may be used to mark out the planting stations.
Prepare the seedlings by watering in advance to ensure the compost is moist when you come to prick out the seedlings. Ideally the seedlings should not be wet when you prick them out as this will make them more susceptible to damage.
Tap the tray of seedlings to loosen them from the sides.
Prick out the seedlings by:
- Loosen the compost with your dibber and holding the seedling by the leaf gently tease it out of the compost
- Make a hole in the compost using your dibber and insert the seedling into the hole. Gently firm the compost around the seedling
Remember – never pick up a seedling by the stem, as this will cause damage. Always pick up seedlings by the leaf using your thumb and forefinger. Do not delay inserting the seedling into the compost as they dry out very quickly.
Most seedlings are pricked out individually but some seedlings such as Alyssum and Lobelia are pricked out in clumps of up to five seedlings.
Gently firm the compost around the seedling. The seed leaves should sit just above the compost – if the seedling is left very tall it will not produce a sturdy plant.
Water the seedlings in, place the container in a warm environment to grow on (18– 20 °C), and protect from strong sunlight.
Keep a careful eye on watering and check regularly for pests and diseases.
Hardening off
Reduce the growing on temperature and eventually move the seedlings outside to covered cold frames. Increase the ventilation during the day and eventually leave the lights (wooden framed glass panes used to cover cold frames) off at night. Protect the seedlings by covering the lights with straw or newspaper should frost be forecast.
Good luck and happy gardening!
For any gardening tips why not contact Tom Cole, Senior Horticultural Lecturer, Writtle College, Chelmsford, CM1 3RR by post (including a SAE) or by email at tom.cole@writtle.ac.uk


